• Skip to primary navigation
  • Skip to main content
  • Skip to primary sidebar

Facial Exercise Central

Lose a Decade From Your Face!

  • Home
  • Facial Exercise Before and After
  • Facial Exercise Programs
  • Facial Exercise Instructions

Facial Exercisers

Does DermaWand Work for Achieving Smoother and Tighter Skin?

May 26, 2022 by Feyisolami Akinyele

Having silky smooth skin doesn’t have to be unattainable. Numerous solutions can help you retain youthful looks, tighten your skin, and improve your complexion. DermaWand is one such solution. But does DermaWand work to improve your skin effectively? Read more to find out.

DermaWand in Detail

DermaWand is a hand-held, electrical beauty product that aims to reduce the appearance of wrinkles and give you noticeably smoother skin. Other advertised effects include smaller pores, tighter skin, no under-eye bags, fewer laugh lines, and lifted eyebrows.

It is said to be a safe and natural method of improving and uplifting your appearance. Moreover, some state that it improves skin texture and blood circulation, which leads to visibly clearer and healthier skin, a reduction of skin discoloration, and the natural prevention of wrinkles.

The DermaWand has a contoured tip that makes contact with the surface of your skin. It also has a medium-sized handle that you hold while you massage your skin. 

How DermaWand Works

Using a weaker form of high-frequency microcurrents, DermaWand stimulates the skin’s surface. People tend to massage DermaWand on both their face and neck. As a DermaWand review, the following section will take you through how to use DermaWand.

Steps to Using DermaWand on Your Skin

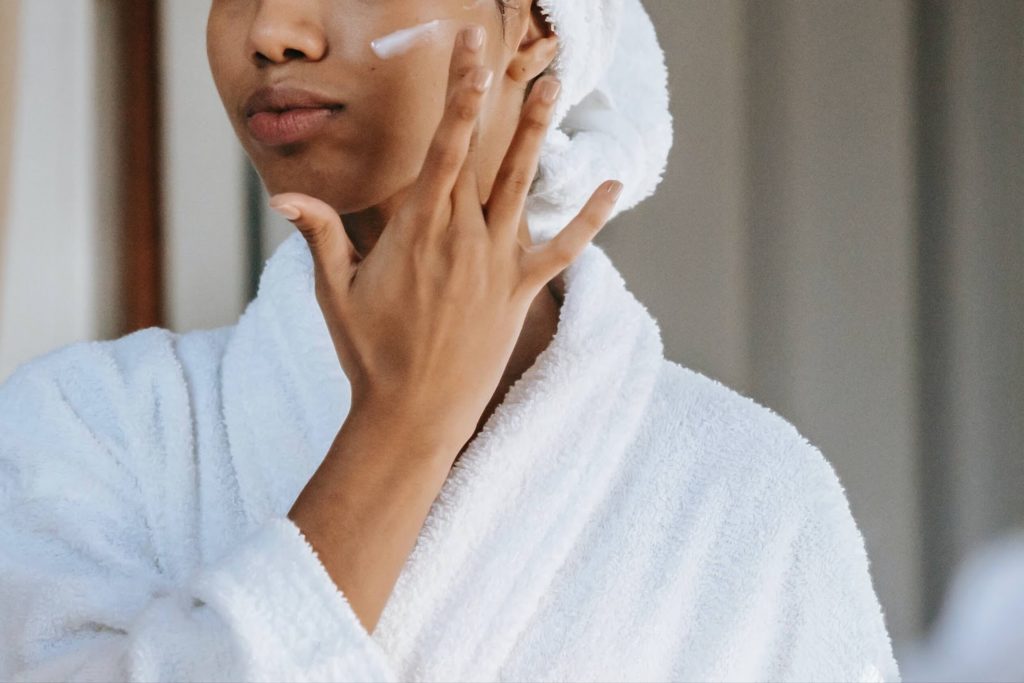
Step 1: Cleanse your skin. Cleansing removes all the built-up dirt, bacteria, and other impurities. It makes it easier to use the product and hydrates your skin before using DermaWand. In addition, cleansing helps your skin absorb the moisturizer in step 7.

Step 2: Pat (do not rub) your face with a clean towel and ensure your hands and face are dry before handling the device.

Step 3: Plug your DermaWand into an outlet and turn the dial to the setting you want to use. Turn to the lowest setting if it is your first time using it. Remove the cap from the tip and place it on a small part of your skin to feel the tingling effects.

Step 4: Place the tip on your cheek and rub your skin clockwise in small circles with the DermaWand. You should refrain from lifting the device away from your skin until you finish.

Step 5: Continue rubbing the contoured tip in small circles around your face and neck. Manipulate the circular motion to go upwards, and cover all parts, taking care to not go near your eyes. 

Step 6: If you feel comfortable enough, consider turning the dial and changing the settings to what you deem suitable. The highest setting tends to yield the best results.

Step 7: Turn off the DermaWand and put a small amount of moisturizer on your hands. Rub your hands together and coat your face and neck with moisturizer. 

Step 8: Use your DermaWant again on top of the moisturizer. Start by placing the device’s tip on your neck and work your way upwards to your forehead. Continue this step for around 3 minutes to ensure maximum absorption and hydration.

DermaWand Reviews: General Consensus and Customer Experiences

There is a mixture of reactions to DermaWand from various individuals with different skin types, ages, etc. Many say it is effective and thus proves to be much cheaper than frequent salon treatments. They also mention that they feel their skin feeling tighter and smoother through consistent use of the device.

On the other hand, there are equally as many, if not more, people who state that it does not yield any result for their skin. Some individuals also say that it causes redness, skin irritation, etc. Some have spoken about the unreliability of the product and the difficulty in using the device.

The average sentiment towards the product is not favorable. While some swear by it, there appears to be more skepticism of the product and the results it promises. You may benefit from looking into alternative solutions for tighter and smoother skin.

Alternative Anti-aging Products and Solutions

DermaWand is not the only anti-aging product on the market. Moreover, it is not the most superior product using microcurrent treatment technology. 

Numerous items, creams, and devices on the market advertise the same benefits and are equally, if not more, popular. 

The following are some examples that offer better or at least similar results:

1. NuFace

While not a thorough NuFace review, this section will look at the benefits of NuFace as an anti-aging device. NuFace products are FDA-cleared and use microcurrent tech to help you achieve more youthful skin. 

It is a painless and soothing treatment that aims to enhance muscle tone, improve the recovery rate for damaged tissue, and improve how well your skin can absorb other skincare products. NuFace also reduces wrinkles and makes skin feel firmer. 

You can use the device for around 5 minutes daily over the weekdays to help achieve good results. Certain NuFace products also help to reduce the appearance of deeper wrinkles.

2. Facial Massage Tools

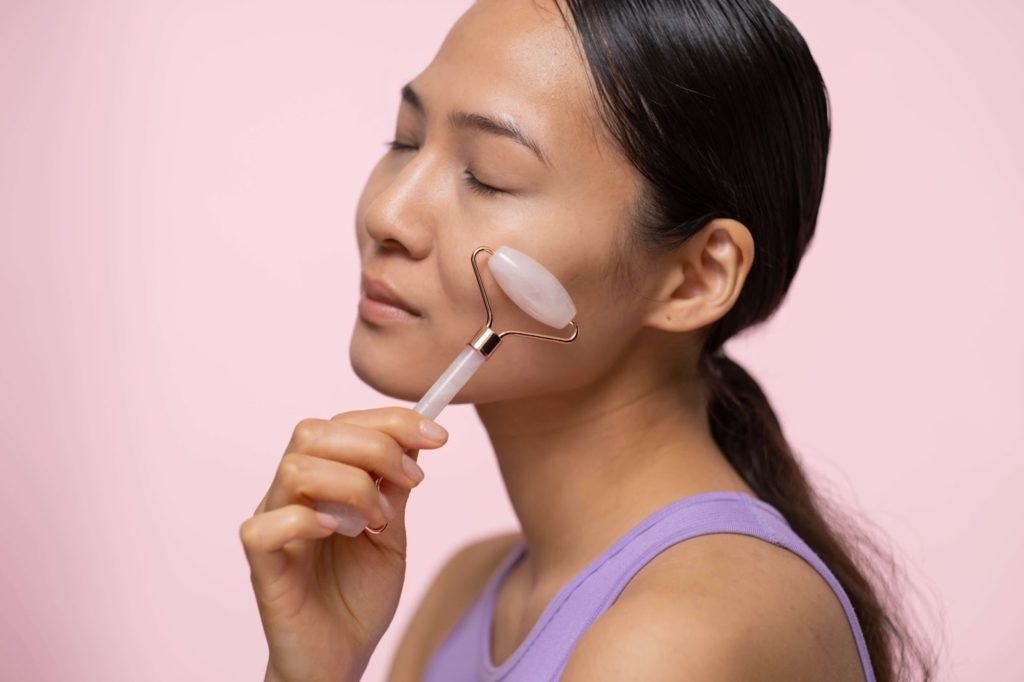
Face rollers are small tools with a small tube-like handle with two rollerballs on both ends that turn when you move them across your skin. There are numerous benefits of facial massage tools similar to what DermaWand advertises.

One benefit of face rollers is that it stimulates blood flow across your skin. Improving blood flow will help bring essential nutrients to your face, thus giving you a healthier and more vibrant appearance. Face rollers also reduce under-eye bags and general puffiness around your eyes.

Natural Alternatives to DermaWand

There are natural solutions for anti-aging other than DermaWand. Such solutions are typically more economical in the long term. This section will discuss facial exercises and exfoliation as a solution to healthier skin.
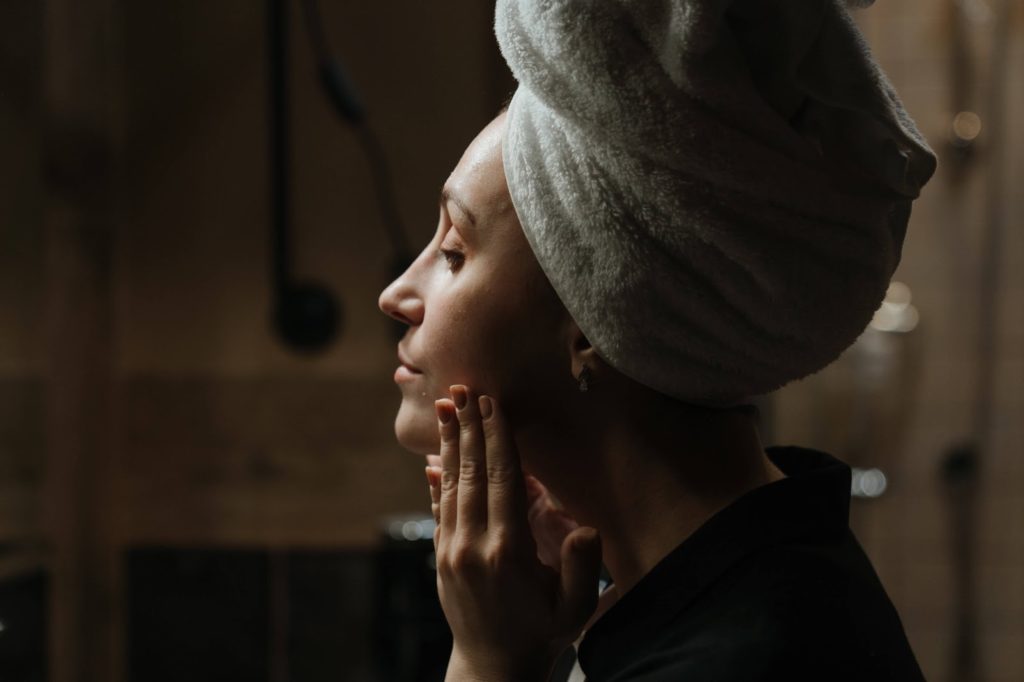
1. Facial Exercises

Facial exercises are natural, non-surgical, and accessible methods of achieving better skin. It only requires a little of your time, no electricity, and is free. Facial exercises yield multiple benefits similar to DermaWand.

Benefits of Facial Exercises

Facial Exercise Central describes that facial exercises are inexpensive and practical. Since facial exercises do not require a lot of time, effort, or money, you can efficiently perform facial exercises to yield tighter skin and thus reduce the appearance of wrinkles. 

Compared to a DermaWand, facial exercises require less effort since there is no need for materials and tools. It requires less time as you can perform facial exercises anywhere at your convenience.
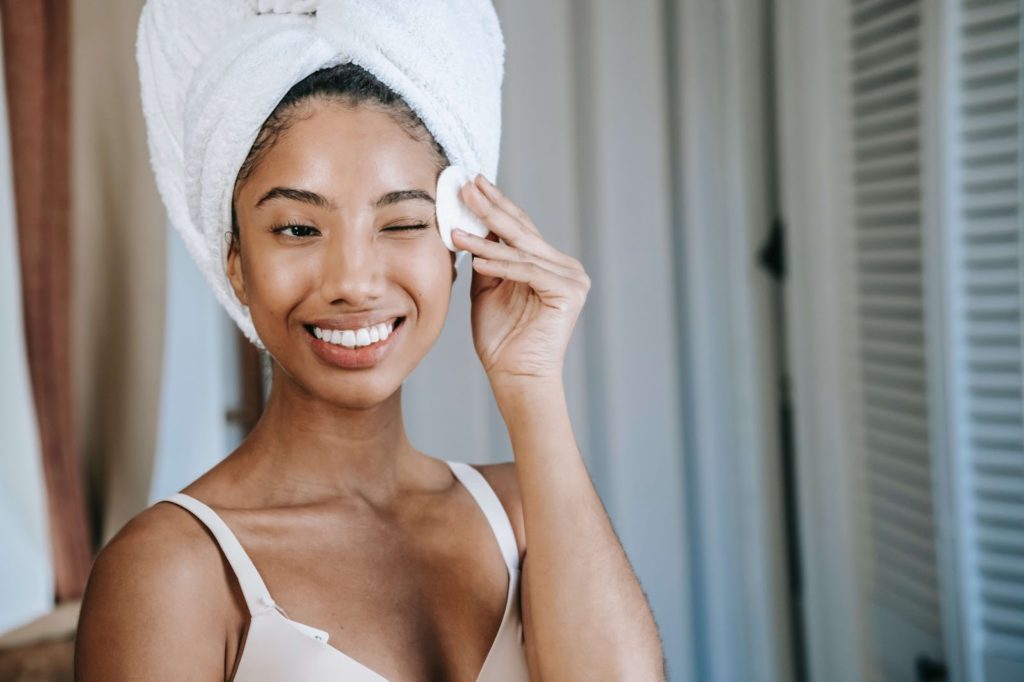
Exfoliation

You remove dead cells from your skin’s top layer when you exfoliate. While such cells naturally shed around every month, they do not shed entirely. Using exfoliating equipment such as gloves, brushes, or scrubs, you can effectively and gently strip away dead cells. Certain chemicals like beta-hydroxy acids also help exfoliate the skin.

Benefits of Exfoliation

As with DermaWand, exfoliation can help your skin look and feel smoother. It helps your skin better absorb vitamins and products by removing impurities. Exfoliation also unblocks your pores, resulting in fewer blackheads.

Conclusion

Regarding anti-aging devices, tools like DermaWand appear too good to be true. That is certainly the case for many people, with few or no benefits for a relatively high price. Some find DermaWand useful, though there are more effective solutions on the market. For a free and natural way to lift your face and improve blood circulation, consider facial exercises that are time and money friendly.

FAQs

What Does DermaWand Do to Your Face?

It transmits microcurrents to your skin’s surface, creating heat. DermaWand intends for the microcurrents to introduce thermal energy, massage, and bring oxygen to your skin to help revitalize it and give you a smoother and firmer complexion.

Is DermaWand FDA Approved?

DermaWand is an FDA-cleared treatment as a Class I medical device, so it is not FDA-approved. Being FDA-approved is for certain drugs where the advantages brought out by the product are more significant than the risks.

Is DermaWand High Frequency?

DermaWand utilizes a condensed form of high-frequency microcurrent to nurture the skin. The DermaWand delivers microcurrent signals to the surface of your skin at approximately 100,000 cycles every second. It is said to be powerful enough to yield visible results at such a rate.

How Long Does It Take for DermaWand to Work? 

How long it requires before noticeable results appear varies by individual. Reviews describe semi-immediate results in just a few days before seeing better complexion. Others say it took consistent use for two months for even slight changes to become noticeable. Some state that it yields no results for their skin.

Is DermaWand Safe to Use?

According to the FDA, the device does not pose a significant risk. As such, DermaWand is safe to use. However, some customer reviews state that DermaWand is unsuitable for sensitive skin and can cause irritation.

Filed Under: Anti Aging Products, Facial Exercisers

Can I do Facial Exercises After Botox?

April 4, 2022 by Feyisolami Akinyele

The society we live in views youthfulness as a sign of beauty. However, we can’t evade the effects of aging. Despite our efforts to live healthy and stay young, years of sun exposure, age, and gravity soon take their toll, and the wrinkles set in. Botox, one of the most popular non-surgical solutions to aging, has been around for decades and keeps providing consistent results for patients.

Getting your Botox treatment for the first time can leave you nervous and conscious about your facial movements. While it is natural to feel concerned about your facial expressions, so you don’t end up with an awkwardly frozen face, this concern is unwarranted. I’d be explaining why it is not only safe for you to do facial exercise post-injection but also medically advisable.

What is Botox?

The bacterium Clostridium botulinum releases a toxin branded as Botox. This toxin causes a very deadly condition known as botulism that can paralyze the muscles. When injected in minute portions, Botox works to block the nerve cells, keep muscles from contracting and thus helps to reduce the appearance of wrinkles and prevent new ones from coming up.

Botox treatments are also effective in treating lazy eyes, neck spasms, overactive bladder and some other ailments like migraine. It clears out fine lines and wrinkles safely and effectively, giving you a youthful appearance that lasts for months.

These effects take about four days to become evident as the process is relatively slow. Facial exercises have proven to speed up its operation and allow the toxin to work faster.

Facial Exercises Accelerates Botox Results

Botox treatments take about three to four days to become evident. In emergencies, where patients come in for a quick Botox treatment before an important event, this might be a problem. Simple facial exercises have proven to be very effective in speeding up the Botox effect. These exercises help the toxin bind up the receptor cells sooner, allowing the muscles to relax faster. 

However, Many Doctors have questioned this conventional wisdom claiming that these exercises make no difference-making it fall out of favor.

The Benefit of Facial Exercises Post-injection 

The Northwestern University Feinberg School of Medicine conducted a recent study showing you the effect of facial exercises on Botox treatments. According to this study, facial muscle exercise can speed up the wrinkle-reducing effect of Botox to about one day instead of the usual three to four days.

“Patients often leave getting their Botox to the last minute,” said lead study author Dr. Murad Alam, professor of dermatology at Northwestern University Feinberg School of Medicine and a Northwestern Medicine physician. “If people get their botulinum toxin right before a social engagement or important work event, they may worry it won’t start working in time. Speeding up the effects could be important to people.” He explained that since there was no well-designed study that compared the effect of the exercise and no exercise, they decided to do one. 

Dr. Alam wanted to see if facial muscle exercises helped as conventional practices suggested. Especially for those who had to wait until the last minute to get their treatment.  

The Study

Alam enrolled 22 adult women sprouting forehead wrinkles. He treated all with botulinum toxin. Half of these women underwent facial exercises. They raised their foreheads and made scowls while knitting the brows in three sets of 40 repetitions separated by 10 minutes for a total of four hours, and the other half did nothing. 

After the first treatment, the participants were observed. Both participants and clinicians discovered that fine lines and wrinkles were reduced within two to three days for those who did the exercises. The effect took as long as three to four days for those that didn’t. It showed that facial exercises gave results one day sooner than when it isn’t performed.

Dr. Alam explained, “It’s useful to know that it can be sped up. It’s pretty easy to do, not a lot of work, it doesn’t take much time either.”

The participants were studied for another two weeks, after which there was no difference in either group. There was no difference in how long the treatment lasted in both groups. The benefit was majorly how quickly the wrinkles reduced. 

To reduce bias and improve the consistency of his findings, Dr. Alam retreated the participants six months later. This time he reversed the experiment. Those who had exercised last time now avoided facial exercises, and the others are performing exercises. At the end of the investigation, 69% of the participants believed facial movement relaxed the muscles and reduced wrinkles faster. 59% found the facial exercises very easy to perform. 

 “For patients who need quick results, the exercise may be worth the effort. Patients appreciate having more control over their care,” Dr. Alam says.

Do’s and Don’ts After Botox Treatment

Facial exercises have been approved to be best after a botox session. However, there are certain things you shouldn’t do to get the optimal result. Here are some do’s and don’t’s of post-Botox treatment. 

Don’t: Do not rub your face for 24 hours.

Post-injection, you need to avoid rubbing your face or applying pressure on it for about 24 hours. Doing this could cause the toxin to move to an unintended area. This can cause unsatisfactory effects like sagging eyelids or nerve damage. 

Do: Try facial exercises.

During the first hours post-treatment, make pronounced facial expressions, such as frowning, smiling and raising your eyebrows and forehead. Facial exercises after Botox treatment boosts the Botox and make it work faster.

Don’t: Do not exercise straight away.

It is advised that patients avoid any strenuous activity for about 24 hours after Botox treatment. Such movements may cause bruising on areas injected with Botox. You risk the toxin spreading to muscles it shouldn’t be touching. So, cancel that exercise class and put your feet up.

Do: Take notes of side effects.

If you should experience any unusual side effects after your Botox procedure, seek your Botox practitioner and explain your experience. They will be able to give you the best advice.

Don’t: Do not engage in activities that put pressure on your head.

Activities like swimming, performing inversions, bending down, and any other that might apply pressure to your head should be avoided. Stress on your treated area can move your Botox around and strengthen your chances of bruising.

Do: Avoid getting overly heated. 

Avoid getting too hot for about 48 hours after the treatment. It would be best to avoid strenuous exercise, drinking alcohol, hot weather, sauna, and the steam room. Heat increases blood flow which would reduce the effect of Botox.

Don’t: Do not book any big event for the first few days.

Avoid booking any big event for the first few days. You will experience side effects like swelling, redness or bruising around the treated area. Though this varies from person to person and might not last very long for you, it is better to be prepared.

Do: Avoid strong painkillers.

Avoid strong painkillers after your procedure. If you experience any pain, consult your doctor. These painkillers are not crucial with non-invasive procedures like Botox. Applying an ice pack to the area can help reduce bruising.

Summary

Botox is an effective cosmetic procedure that helps clear out wrinkles and leaves you with younger and vibrant skin. To get the most benefits, it’s up to you to follow your doctor’s post-treatment advice.

After receiving a botox treatment, there are several things that a patient is advised to do and not do. Facial exercises have been highly recommended as study has shown it is very effective in ensuring a faster response from the treatment. Massaging or applying pressure on the skin can cause bruises and have other adverse effects on botox.

It would help if you avoided other activities like partaking in strenuous exercise for the first 24 hours after treatment. This is to protect the patient from harmful impacts to the botox or bruising of the skin. Staying away from the gym for the day might be difficult for some people, but it’s worth ensuring good results. 

Side effects of Botox treatment might include:

  • Headache or flu-like symptoms
  • Droopy eyelid or cockeyed eyebrows
  • Crooked smile or drooling
  • Eye dryness or excessive tearing

However, consult your doctor immediately if you experience severe side effects like trouble breathing, blisters, or intense swelling.

Filed Under: Facial Exercise, Facial Exercisers, Skin Care

Powerful Facial Exercises to Prevent Marionette Lines

April 4, 2022 by Sarah Gray

Marionette lines (also known as laugh lines) are often associated with aging. However, it is not unusual to notice indications of such lines even as early as your 20s. While they are perfectly natural and absolutely nothing to feel self-conscious about, you may have personal reasons why you wish to have them removed.

What Can Cause Laugh Lines?

To give you context into why facial exercises work to reduce the appearance of laugh lines, let us first look closer into why and how they can occur.

Laugh lines are wrinkles caused by reduced collagen production that emerges over time. As part of the natural aging process, your skin can lose its elasticity and look more stretched. Other causes of laugh lines involve frequent exposure to the sun and inadequate nutrition. 

Many different methods help reduce the appearance of marionette lines, some being more invasive than others. One of the less invasive techniques to minimize laugh lines involves habitually performing facial exercises (in other words, taking part in face yoga). 

Face yoga can be highly advantageous in helping you to remove laugh lines. They are easy to perform and can also be an enjoyable part of your routine.

Best Facial Yoga Exercises To Treat Laugh Lines

Several muscles in your face may stand to benefit from frequent exercise. As such, this is where face yoga comes into play. Face yoga involves numerous activities to help tone and strengthen your muscles.

This article will cover six different exercises that are very easy to implement in your daily life. Before we start, it is essential to know that you must perform the exercises every day to yield effective and timely results. Furthermore, some activities pay the most benefits when you complete them twice a day.

1. The ‘O’ shape and tapping

The first exercise helps to strengthen the muscles between the mouth and the chin, where marionette lines would form. The ‘O’ shape exercise can be considered one of the most popular exercises in face yoga and has proven to be highly effective for many individuals.

During the exercise, you will notice that the form you shape the lower half of your face into results in no lines between your lips and chin. It strengthens the muscles between those areas and can promote increased circulation throughout your entire face, thus helping to reduce the appearance of laugh lines.

To complete this exercise, you will need to follow a series of manageable steps:

Step 1: Lower your jaw and shape your mouth into a distinct ‘O’ shape. You will notice that several sections of your lower face feel strained as the muscles form for this step. Continue to hold this shape for all of the following steps.

Step 2: Gently place the tips of your forefinger an inch below your lips near your jaw.

Step 3: Use the tips of your fingers to make small yet quick taps. Start from your jaw, go past your lips, and end at the sides of your nose.

Step 4: Quickly tap your fingers both up and down your face for 15 seconds

Step 5: Complete another set twice and stop.

2. The ‘L’ shape and lift

Along with strengthening the muscles between your lips and chin, this exercise can also help tone your lower jaw. This exercise uses your lips and hands to help further shape your lower face. It enables you to directly encourage the corners of your lips to lift upwards instead of downwards.

This exercise requires you to complete a few simple steps:

Step 1: Shape your left hand into an ‘L’ shape and your right hand into a backward ‘L’ shape. Next to each other, your hands should appear as if you are replicating the bottom half of a regular square shape.

Step 2: Place your hands on your face such that your thumbs rest towards the bottom half of your cheek. Your thumbs should be pointing towards each other and the rest of your fingers pointing upwards.

Step 3: Press your lips against each other so that you can no longer see them and hold that position for 5 seconds.

Step 4: Repeat step 3 twice.

3. Lipless smile

With this exercise, you can use the muscles directly around your lips while upwards pulling the skin above your chin. The lipless smile exercise helps reinforce the skin where laugh lines would often occur, thus helping to prevent them from forming.

To complete this exercise, you can follow a straightforward set of steps:

Step 1: Tighten your lips and hold them towards each other so that you can no longer see them. You will notice that the skin around your lips is kept tense in this shape.

Step 2: Place each forefinger on each corner of your lips gently.

Step 3: Hold that position and attempt to smile without showing your lips for 5 seconds. This action will strain your muscles in the area.

Step 4: Relax your muscles and repeat the process another two times.

4. Pucker exercise

This exercise involves the simple use of your lips without the need for hands. For this exercise, the main goal is to strengthen the section between your lips and nose.

When you make expressions, you often utilize the corner of your lips and your chin. Whether you’re smiling, laughing, or frowning, those areas are typically most used. It is an excellent idea to strengthen your upper lips and help lift the lower half of your face to reduce the appearance of laugh lines.

To help you perform this exercise effectively, below is a short sequence of actions that you can complete step-by-step:

Step 1: Shape your lips into a ‘pucker’ shape. You will likely notice that the skin between your nose and lips is curved upwards with this step. This shape helps improve blood circulation and firm up the muscles in the area.

Step 2: Hold that ‘pucker’ shape for at least 10 seconds and release the tension around the area.

Step 3: Repeat the process four times.

5. Pufferfish face

Several exercises help get your blood circulating nicely around your face. Blood circulation is important because it facilitates the cycling of blood, oxygen, and essential nutrients around your face. Good circulation can help to give you healthier skin and help you maintain your natural complexion.

The pufferfish face exercise is one exercise to help with blood circulation and muscle strengthening. To perform this exercise, you need to follow a series of steps:

Step 1: Puff out your face by ensuring that your lips touch tightly and fill your cheeks with air. This step involves pushing air towards your closed lips, giving the appearance of a pufferfish.

Step 2: Hold that position for 5 seconds, then push the air from the center of your face towards your left cheek.

Step 3: Hold that position for 5 seconds and push the air towards your right cheek.

Step 4: Continue holding that position for 5 seconds, then move the air towards your upper lip.

Step 5: Lastly, after 5 seconds, move the air onto your lower lips towards the chin area. It is important to note that you should feel resistance from those areas.

Step 6: Release the air by breathing and repeat the exercise twice.

6. Upper Lip Air Exercise

Strengthening your upper lips is an excellent method to help you achieve a lifted and firmer lower face. The upper lip air exercise intends to help firm up the muscles in your upper lip while also allowing you to strengthen the muscles in your cheek.

The upper lip air exercise can also help circulate blood and oxygen around your cheeks and lower face more effectively, therefore helping you get more nutrients into your skin.

For this exercise, there are a few simple and easy steps for you to follow:

Step 1: Ensure that your face is relaxed and untensed.

Step 2: Place 3 fingers (specifically your forefinger, middle finger, and index finger) on your upper lip in a line. The sides of all three fingers should be touching one another.

Step 3: Close your lips tightly and fill your cheeks with air. Start with centering the air towards your lips.

Step 4: Move the air to your left cheek and then transfer it towards your right cheek. Air should be moving between your left and right cheek at an average speed for this stage.

Step 5: Continue step 4 for 30 seconds and repeat once or twice in one session. It would be ideal for you to perform this exercise at least twice daily for best results.

Protect Your Smile With Facial Exercises

Utilizing the exercises listed above can help strengthen the muscles where marionette lines often appear, reducing the appearance of such lines and helping to lift your smile naturally.

To reiterate an important point, you must complete your chosen exercises daily, at whatever time is most convenient. Adding the activities to your daily routine helps firm up the muscles in your face and prevent marionette lines more quickly and more effectively.

Whichever exercise(s) you choose to incorporate into your routine, it is likely to yield considerably positive results in helping to remove marionette lines (as well as having other benefits to your face shape in general). Simple, non-invasive, and likely to bear fruit, facial exercises are worthwhile.

Filed Under: Face Exercise Instructions, Facial Exercisers

7 Best Facial Exercises After a Stroke

April 3, 2022 by Feyisolami Akinyele

Strokes are usually caused by the decrease or blockage of blood supply to the brain, which can occur without any prior warning. Usually, the symptoms you’ll need to watch out for include headaches and numbness, to mention but a few. There are a few ways to mitigate the damage, and this post sheds light on facial exercises after a stroke that guarantees results.

According to the Center for Disease Control and Prevention (CDC), strokes are the fifth leading cause of death in the USA, as nearly 800,000 people have a stroke each year. Strokes can also cause short and long-term disabilities, depending on how quickly the affected individual gets medical attention.

After a stroke, patients may find it challenging to produce facial expressions, like smiling and displaying emotions, due to weak facial muscles, which is later diagnosed as facial paralysis or Bell’s palsy. 

What is Facial Paralysis?

Facial paralysis occurs due to damage to the nerve cells controlling facial movement. Because of this damage, the muscles can become atrophied, causing some parts of the face to droop. Paralysis of this sort makes speaking, expressing facial emotions, and moving the face difficult. As a result, facial exercises are recommended in post-stroke therapy to assist patients in regaining full or partial facial mobility. By practicing these exercises repeatedly, your brain learns to use different neural pathways to regain facial control.

NB: Though effective in helping you regain and improve your facial movements, not all these exercises will suit you. Discuss with your doctor to get the best recommended facial exercises for you to do after a stroke.

Facial Exercises Post-Stroke

Therapy is one of the treatment processes you’ll need to embark on after a stroke, and a significant part of therapy will involve facial exercises. When done repeatedly and regularly, these facial exercises will place you well on your way to total recovery. 

Based on your therapist’s instructions, you can work on your exercises up to four times daily, with about 30 repetitions per exercise. Let’s take a quick look at some common facial exercises you can do after a stroke.

1. Facial Stumulation

Like you would in a regular gym, you need to perform some warmups before beginning your facial exercises. Preparing your muscles by stimulating them will help reduce discomfort and pain after your exercise. We recommend sitting in front of a mirror to monitor your movements.

For facial stimulation, you’ll need to attempt to move all parts of your face. Start by winking, wrinkling your nose, and moving your mouth from side to side. Remember to work slowly and gently. Don’t let it deter you if you notice that you have no control over some parts of your face. It’s a gradual process – you’ll need time before you regain total facial movement. If it proves to be too difficult, you can use your fingers to massage different parts of your face gently.

2. Smile and Laugh

After your facial warmup, try smiling. Smile without showing teeth, then show a little. Try to balance the muscle strength on both sides. Repeat the process until you can feel your face moving. 

You can also think about a good memory that brings a wide grin to your face so that you can laugh. Laughing uses multiple muscles in the face, making it an excellent way to encourage nerve stimulation and help improve blood circulation to the face.

3. Eyebrow Exercises

Eyebrow exercises are great for stimulating muscles around your forehead. The process is simple. Raise and lower your brows in a slow and steady rhythm. After doing this, keep your eyebrows raised (you can use your fingers) for 10-15 seconds before lowering them. Repeat this process up to 3 times.

Next, wrinkle your forehead and use your fingertips to make firms strokes on your brows, rubbing them up to the hairline. Keep your face in a frowning state, and try lowering the eyebrows. These exercises will help improve movement and blood circulation to your forehead and eyes. Do these for a few minutes two times a day, increasing your repetitions slowly.

4. Eye Exercises

After a stroke, patients might find it difficult to close their eyes, causing difficulty sleeping. These exercises can help you regain control of your eye muscles. Slowly squint your eyes as though you are staring at the sun. Next, look downwards without bending your neck. The idea is to pretend that you’re peeking at something on the floor.

You can also use your fingers to stretch out your eyelids. Place the back of your index finger on your closed eyelid, and with your thumb as an anchor, stretch your eyelid upwards. This exercise helps relax your eyes and prevents the muscles around them from getting too stiff. Winking is also practical here; wink with one eye and gently alternate with the other. However, note that you must stop if you notice any inappropriate muscle movements.

5. Nose and Cheek Exercises

Your nose and cheeks are important parts of your face, so you must pay special attention. If the muscles in this area are weak, they can affect the strength of your entire face. 

The first step for this kind of exercise is to wrinkle your nose. Think about a bad smell, like when you broke a rotten egg. If your nose isn’t moving, you can help by using your hand to push your nose upward. 

Nose and cheek exercises will need you to make a lot of weird faces, so try to have a bit of fun as you go. Flare your nostrils and try to maintain that position for a few seconds. Breathe deeply through your nose before flaring your nostrils. Great news if a part of your face hasn’t been affected by the stroke. Now, try to cover the unaffected part of your face so the muscles in the affected places can do their work without any interference. Repeat these exercises several times throughout your day.

6. Mouth Exercises

Face paralysis can make it difficult to eat or drink. It’s also not uncommon to sometimes have some dribble leak out of your mouth, significantly when the stroke has affected the tongue. These exercises can help strengthen your mouth and jaw muscles, giving you better control of your facial movements.

Start by opening your mouth wide. Pretend to smile before closing your mouth. Practice frowning as well. Next, gently pucker your lips, place them in a position as though you’re about to whistle, and then relax. Finally, open your mouth wide but place your hands under your chin to restrain movement.

7. Jaw and Tongue Exercises

To strengthen your jaw and tongue muscles, try these exercises: Start by sticking out your tongue as far as possible and holding it for about five seconds before resting. Also, try retracting your tongue inside your mouth and keeping it at the roof of your mouth for three seconds before relaxing.

Next, stick out your tongue as far as you can and press down on it with the back of a spoon as you try to lift it. Finally, place a finger on your cheek about one inch from the corner of the mouth, and then push that finger with your tongue from the inside of the mouth. You can stretch your jaw by opening your mouth wide, moving your lower jaw left and right, and then moving it circular. You can repeat these motions ten times each, four times a day.

Benefits of Facial Exercises Post-Stroke

The big question is, do facial exercises work? The answer is yes. Studies have shown that these face workouts can help improve the functionality of the face and can assist patients in restoring some of their lost function. These recommended exercises will play a crucial part in your recovery from facial paralysis and, when done right, will lead you to a faster recovery.

Conclusion

While performing facial exercises, you must be as gentle as possible. Chew your food using both sides of the mouth to retain the natural pattern of your muscles. 

The exercises we’ve listed are safe and straightforward. Ensure that you don’t overexert your muscles. If your muscles feel stressed, try to relax. Don’t rush the process. You’ll recover faster than you think.

Filed Under: Face Exercise Instructions, Facial Exercisers

A Guide To The Muscles Of The Neck & Face

November 24, 2015 by Natalie Taylor

A Guide To The Muscles Of The Neck & Face

Image: Illya Zorya

The muscles of the face and neck are among the vital muscles of the body. Without them, movement and certain body functions like swallowing and chewing will be impossible. Hence, knowing what these muscles are and what they do is important as it can help us make better choices for both our health and body.

Muscles of the Face

The facial muscles is a unique muscle group. Unlike other muscles in the body that are connected solely to bones, most facial muscles connect the bones to the skin. This unique connection of muscles to bones and skin enable certain vital body functions.  For example, the muscles zygomaticus major and orbicularis oris make it possible for us to make different facial expressions and move our cheeks and lips when we speak and eat.
The simple acts of biting and chewing also involves several facial muscles. These include the mastication, masseter, and temporalis muscles. The mastication muscles move the mandible while the masseter and temporalis muscles move the jaw during chewing.
Facial muscles are responsible for tongue movement. Four sets of extrinsic muscles work together to move the tongue into any direction.
Eye movement is also made possible with facial muscles. Six extrinsic eye muscles work together in great accuracy and speed to enable eye movement and rotation. Inside the eyes is another set of muscles that make it possible for us to dilate the pupils and focus on objects.
The facial muscles are not limited to those that can be found in the eyes, cheeks, and mouth; they can also be found inside the ears. Stapedius, the smallest muscle, controls the movement of the stapes to help control the amplitude of sound waves coming from the external environment.

Muscles of the Neck

The muscles of the neck play an important role in the gross motor movement of the head and neck. These muscles, the sternocleidomastoid and the trapezius, work together so we can move our head in every direction that we want.
By working in pairs, these muscles enable us to flex or extend our head and neck. And by working individually, these muscles enable head rotation or neck flexion either to the left or right.

Taking Care of the Face and Neck Muscles

Just like the rest of the muscles of the body, our face and neck muscles can also lose their elasticity and flexibility in the long run. And just like the rest of our muscles, they need to be ‘worked out’ to keep them from sagging.
It’s when the muscles of the face and neck start to sag that the signs of aging become more apparent. This is where facial exercise becomes beneficial.
Facial exercise is created out of a basic premise that the facial muscles are just like the other muscles of the body. If they are not ‘moved’ regularly, they can sag and make you look old.
Facial exercise advocates advise doing it for at least a minute on a regular basis (the earlier, the better) to make the most of its benefits.
For starters, here’s some examples of facial exercise routines that can be easily done at home:

Forehead exercise: Place your hand on the side of your forehead, just near your temple. Make sure that your thumb is positioned nicely at the lower hairline while the pinky finger at the end of your eyebrow. Use your pinky finger to gently pull your skin towards your hairline. While your skin is taut, move your eyebrows rapidly up and down.
Another way to exercise the muscles of your forehead is to raise your eyebrow as high as possible while you pull the skin taut. Hold it for 5 seconds then repeat gain. You can repeat this routine for 5 times each day.
Cheeks exercise: Start by placing an index finger on the middle of your cheeks. Then, start making small but firm outer circles. While you do this, make an “O” shape from your lips, extending it as far as possible. Pull your lips back and do it again.
Neck exercise: While tipping your head back, slide your lower lip over your upper lip. Hold it for 5 seconds then relax. Repeat it for five times.

The facial gestures and head movements we do each day may seem so simple but behind them is a network of muscles working together to make them possible. So take care of them. Simple routines like the ones outlined above can benefit not just your facial muscles but as well your skin.

Filed Under: Face Exercise Instructions, Facial Exercise, Facial Exercisers

Cheap Facial Exercisers

November 29, 2011 by Natalie Taylor

Some facial exercise products are expensive. However, that is not true of all products of course – you can buy a book to teach you a workable routine for under 10 dollars. In fact one of my favorite anti-aging books can usually be found for around one penny on Amazon.
Zone Therapy: Youth, Beauty and Health in Ten Minutes a Day
On the other hand, MicroFacial Exercisers that work with micro-electric currents, do tend to be expensive. You can expect to pay anything between $100 and $350 for a machine designed for personal use. Of course, those built with salon owners in mind are even more pricey.
A facial exercise solution that is kind of inbetween microcurrent machines and doing everything by moving the
muscles with the help of your fingers, are devices such as the Facial Flex, or Neckline Slimmer. These give you a
hand in performing exercises without the need to spend a large amount of money.
See a selection of cheap facial exercisers available on Amazon.com below.
[amzn_product_inline asin=’B0028M7B46′]
[amzn_product_inline asin=’B00005JHWB’]
[amzn_product_inline asin=’B000V2F9RQ’]
[amzn_product_inline asin=’B001R94UNG’]
[amzn_product_inline asin=’B003F88N3K’]
[amzn_product_inline asin=’B00557A5AS’]
[amzn_product_inline asin=’B00557A63E’]
[amzn_product_inline asin=’B00644MSQA’]
[amzn_product_inline asin=’B002F4Z18A’]
 

Filed Under: Facial Exercisers

  • Go to page 1
  • Go to page 2
  • Go to Next Page »

Primary Sidebar

Recent Posts

  • How to Accentuate Your Cheek Bones, the Right Way
  • Can Your Skin Become Immune To Skin Care Products?
  • Wash Face Post-Workout: Yay or Nay?
  • How Does Diet Affect Your Hair?
  • Jack LaLanne: The Pioneer Of Facial Exercises

Facial Exercise Programs

  • What is the suitable age for facial exercises?
  • 4 Signs You Need A Facial Exercise Program
  • Carolyn's Facial Fitness
  • Cynthia Rowland Facial Exercise
  • Facercise by Carole Maggio
  • FlexEffect by Deborah Crowley

Copyright © 2023 · AIKO Theme on Genesis Framework · WordPress · Log in