• Skip to primary navigation
  • Skip to main content
  • Skip to primary sidebar

Facial Exercise Central

Lose a Decade From Your Face!

  • Home
  • Facial Exercise Before and After
  • Facial Exercise Programs
  • Facial Exercise Instructions

Face Exercise Instructions

Rewarding Face Yoga Exercises to Tone Your Face

April 4, 2022 by Feyisolami Akinyele

Weight loss can be long and arduous, sometimes requiring many years of hard work and dedication. To some, face weight can be one of the most challenging to lose successfully. However, while targeting your face weight may not be directly possible, you can get a toned or slim face with these facial exercises.

What Are Facial Exercises, And Why Are They Effective?

To better help you answer the question ‘Facial Exercises: Fact or Myth?’, we will first begin with explaining what facial exercises involve. In addition, we will also start explaining how such practices can prove to be highly effective in helping you achieve a more toned face, with the added benefit of allowing you to feel healthier.

Face yoga involves using your facial muscles to build strength in the muscles that exist in the area. For the best results from face yoga, many recommend that you perform the exercises daily. Face yoga enhances the strength of your facial muscles, enabling you to slow down the aging process and uplift your face.

Although it is highly improbable to lose face weight with face yoga exercises alone, performing them can hold several advantages that help mold and shape your face.

Best Face Yoga Exercises For A Slim Face

Several types of face yoga exercises can contribute to you achieving a slimmer and more toned face. Some of the activities can also help you stimulate the muscles in your neck and improve blood flow carrying essential nutrients around your face.

Improved blood circulation in your facial muscles can tremendously benefit your skin and overall appearance. When deciding which exercises to choose, make sure that you can comfortably perform them daily (or sometimes multiple times daily). 

To help you choose the most suitable exercises, we will cover six practical face yoga exercises.

1. Chipmunk Replica

The chipmunk exercise helps to encourage the strengthening of your facial muscles through repeated, consistent movement across your cheeks. It helps promote blood flow across your cheeks, lips, and even the space between your lips and chin.

The repeated movements required in this exercise help stimulate the skin and muscles around the middle of your face. In addition, performing this exercise twice a day may also help you retain firmer skin.

For this particular exercise, you will need to perform a sequence of straightforward steps:

Step 1: Close your lips tightly but comfortably against each other and fill your cheeks with air.

Step 2: Push the air towards your closed lips and then move the air towards your left cheek.

Step 3: Move the air from your left cheek towards your right, then repeat the process at least twenty times.

Step 4: Release the air by opening your mouth and then take a slow and steady breath.
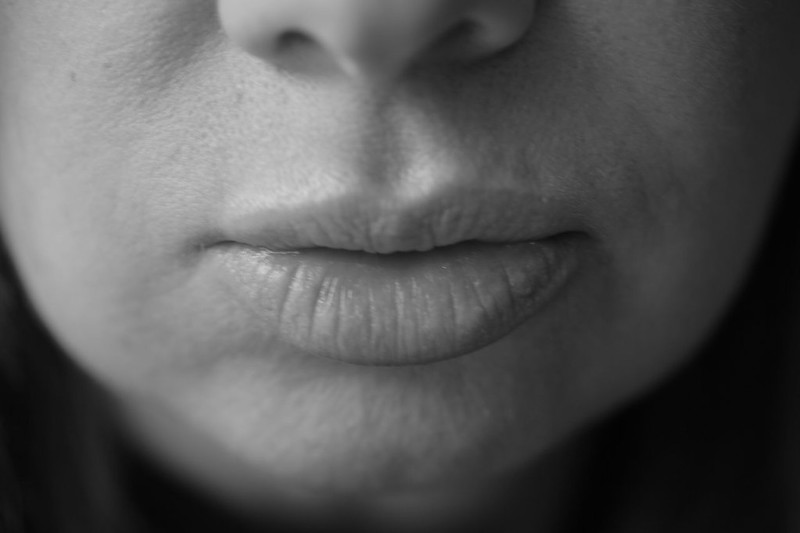
2. Smile Smoother

One particular facial exercise to do at home is the ‘Smile Smoother.’ This exercise is a popular face yoga exercise that enables you to lift the skin in your lower face and enhance muscle strength between your nose and eyebrows.

This exercise stimulates your facial muscles and makes a tremendous difference to the area just beneath your chin and neck. By moving your facial muscles, the ‘Smile Smoother’ actively encourages blood circulation in many vital areas of your face, giving you a more energetic appearance.

For those who wish to complete this exercise, there are a few steps that you must perform:

Step 1: Open your mouth into an ‘O’ shape and wrap your lips around your teeth. For this step, your lips should not be touching each other, and your teeth cannot be showing. Beginners may be able to benefit from first performing this step in front of a mirror.

Step 2: Mold your mouth into a smile shape while keeping your lips apart and your teeth from showing. Repeat this step 3 times.

Step 3: Hold the smile shape and place your forefinger in the middle of your jaw. Putting your forefinger in that section acts as resistance when performing the following exercises.

Step 4: Open and close your mouth while moving your head upwards and downwards.

Step 5: Repeat once again and release all tension in your face.

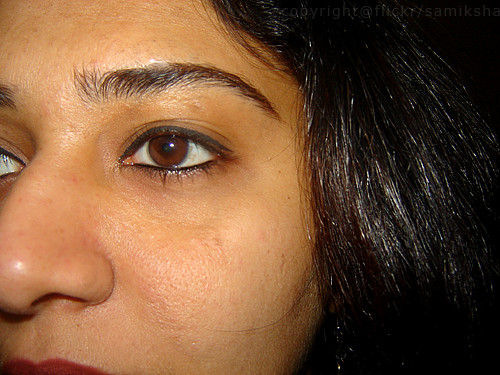
3. Forehead Movement

The ‘Forehead Movement’ exercise uses the muscles in your forehead area instead of the muscles in your lower face. The practice aims to strengthen your forehead muscles and encourage smoothing lines/wrinkles in that section.

The forehead movement requires you to use your hands to complete the exercise. If you are eager to try the activity, follow the following list of steps:

Step 1: Place the tips of your fingers on your forehead so that they sit just below where a normal hairline would sit. It would be best to face directly forwards at this stage, and your hands should be semi-covering your face.

Step 2: Slowly move your head backward until you are staring toward the sky. In this step, your hands should move downwards from the top of your head to just above your eyebrows.

Step 3: Repeat the process listed in steps one and two while also attempting to raise your eyebrows.
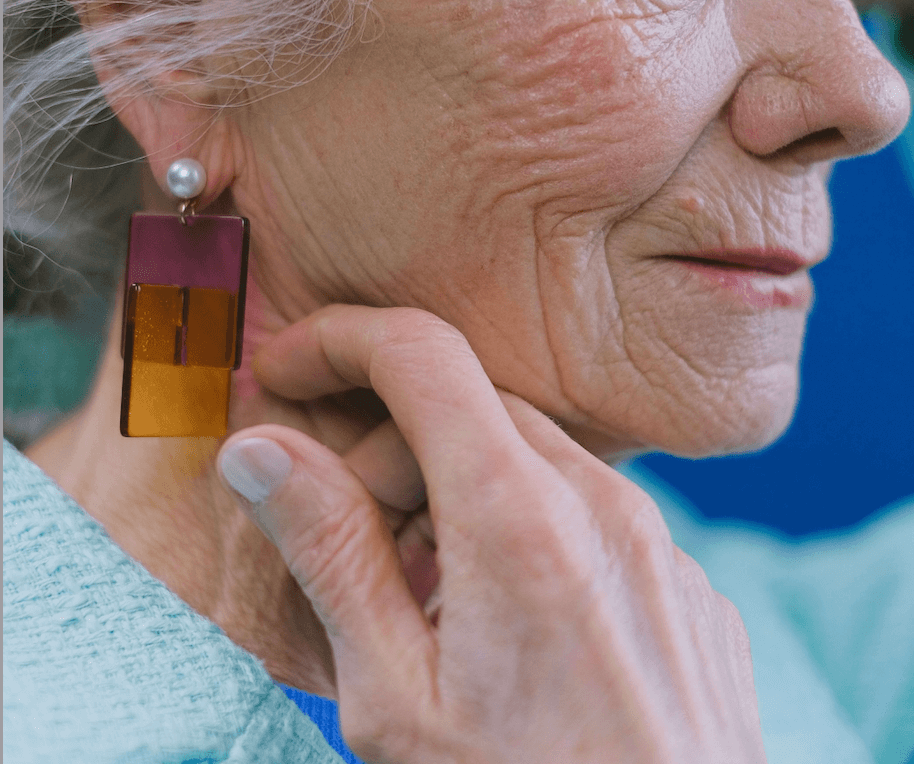
4. Neck Lift

It would be an excellent idea to work on your neck and chin area to slim down your face. This exercise is highly advantageous for those who want to tighten the skin in their chin area and strengthen the muscles in their neck. It involves using your hands to create tension and massage certain areas in your neck.

If you are keen to attempt the neck lift exercise, then follow the following series of steps:

Step 1: Tilt your head upwards to look towards the sky/ceiling. For this step, make sure that you are not placing too much pressure on the back of your neck.

Step 2: Mold each hand so that your fingers except your thumbs are touching and pointing straight.

Step 3: Place your hands on the bottom of your neck so that your fingers are touching your neck. Subsequently, move your hand upwards towards your chin.

Step 4: When your hands reach the area below your chin, move your hands back to the bottom of your neck and repeat the motion at least ten times.

Step 5: Relax your head to no longer tilting upwards and release all tension.

5. Tongue Movement

This exercise aims to strengthen and increase blood flow to your cheek area. Strengthening the muscles in the area can help tone your face further and help to smooth out lines that may appear in that section. Increased blood flow will also help to bring more nutrients to your cheeks, giving you a more vibrant appearance.

Want to perform this exercise, help tighten your cheek area, and achieve a slim face? Then follow the steps listed below:

Step 1: Place your tongue on the upper left side of the inside of your mouth. Your tongue should now rest between your teeth and lips. Keep your mouth closed for this exercise to act as tension.

Step 2: Move your tongue from the upper left side towards the bottom of the left side of your cheek.

Step 3: Move your tongue upwards again to its original position and repeat this movement five times.

Step 4: Place your tongue on the opposite side (upper right side) of the inside of your mouth.

Step 5: Repeat the movement listed in steps 2 and 3 but on the opposite side.
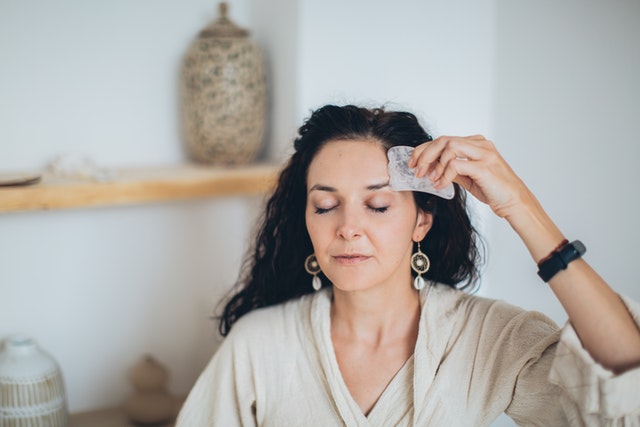
6. Head Smoother

This particular facial exercise would be highly beneficial in effectively relaxing and smoothing the muscles in your forehead. There have also been individuals who stated that it helped reduce noticeable lines in the forehead section. While the exercise explicitly targets that area, it can also stimulate the area just below the eyebrows and above the nose.

If you are eager to perform this exercise and see the benefits of the ‘Head Smoother,’ then carry out the instructions below step-by-step:

Step 1: Place one of your palms on the middle of your forehead.

Step 2: Slowly and gently slide your palm from the center towards the right side of your forehead.

Step 3: Once your palm reaches the right side, remove it and place your other palm on the middle of your forehead.

Step 4: Move that palm towards the left side of your forehead until you reach the area where your hair starts.

Step 5: Repeat the above steps five times for each side and then relax.

Successfully Achieving a Toned Face Through Facial Exercises

Face yoga is a natural method of helping to strengthen the muscles in your face. While it may not directly correlate with achieving a slim face, it still results in many different benefits. There have also been numerous individuals who have reported excellent results after performing specific face yoga exercises consistently.

A toner, firmer face with more taut skin is not too far-fetched with face yoga. To reiterate a prior point, you must perform them every day for such exercises to yield significant benefits.

Regardless of the type of activity you have decided to choose, they will prove very effective. Add your chosen activities into your regular day-to-day routine and watch as the skin and muscles in your face become healthier and more firm over time.

Filed Under: Face Exercise Instructions, Facial Exercise, Yoga Practice

Powerful Facial Exercises to Prevent Marionette Lines

April 4, 2022 by Sarah Gray

Marionette lines (also known as laugh lines) are often associated with aging. However, it is not unusual to notice indications of such lines even as early as your 20s. While they are perfectly natural and absolutely nothing to feel self-conscious about, you may have personal reasons why you wish to have them removed.

What Can Cause Laugh Lines?

To give you context into why facial exercises work to reduce the appearance of laugh lines, let us first look closer into why and how they can occur.

Laugh lines are wrinkles caused by reduced collagen production that emerges over time. As part of the natural aging process, your skin can lose its elasticity and look more stretched. Other causes of laugh lines involve frequent exposure to the sun and inadequate nutrition. 

Many different methods help reduce the appearance of marionette lines, some being more invasive than others. One of the less invasive techniques to minimize laugh lines involves habitually performing facial exercises (in other words, taking part in face yoga). 

Face yoga can be highly advantageous in helping you to remove laugh lines. They are easy to perform and can also be an enjoyable part of your routine.

Best Facial Yoga Exercises To Treat Laugh Lines

Several muscles in your face may stand to benefit from frequent exercise. As such, this is where face yoga comes into play. Face yoga involves numerous activities to help tone and strengthen your muscles.

This article will cover six different exercises that are very easy to implement in your daily life. Before we start, it is essential to know that you must perform the exercises every day to yield effective and timely results. Furthermore, some activities pay the most benefits when you complete them twice a day.

1. The ‘O’ shape and tapping

The first exercise helps to strengthen the muscles between the mouth and the chin, where marionette lines would form. The ‘O’ shape exercise can be considered one of the most popular exercises in face yoga and has proven to be highly effective for many individuals.

During the exercise, you will notice that the form you shape the lower half of your face into results in no lines between your lips and chin. It strengthens the muscles between those areas and can promote increased circulation throughout your entire face, thus helping to reduce the appearance of laugh lines.

To complete this exercise, you will need to follow a series of manageable steps:

Step 1: Lower your jaw and shape your mouth into a distinct ‘O’ shape. You will notice that several sections of your lower face feel strained as the muscles form for this step. Continue to hold this shape for all of the following steps.

Step 2: Gently place the tips of your forefinger an inch below your lips near your jaw.

Step 3: Use the tips of your fingers to make small yet quick taps. Start from your jaw, go past your lips, and end at the sides of your nose.

Step 4: Quickly tap your fingers both up and down your face for 15 seconds

Step 5: Complete another set twice and stop.

2. The ‘L’ shape and lift

Along with strengthening the muscles between your lips and chin, this exercise can also help tone your lower jaw. This exercise uses your lips and hands to help further shape your lower face. It enables you to directly encourage the corners of your lips to lift upwards instead of downwards.

This exercise requires you to complete a few simple steps:

Step 1: Shape your left hand into an ‘L’ shape and your right hand into a backward ‘L’ shape. Next to each other, your hands should appear as if you are replicating the bottom half of a regular square shape.

Step 2: Place your hands on your face such that your thumbs rest towards the bottom half of your cheek. Your thumbs should be pointing towards each other and the rest of your fingers pointing upwards.

Step 3: Press your lips against each other so that you can no longer see them and hold that position for 5 seconds.

Step 4: Repeat step 3 twice.

3. Lipless smile

With this exercise, you can use the muscles directly around your lips while upwards pulling the skin above your chin. The lipless smile exercise helps reinforce the skin where laugh lines would often occur, thus helping to prevent them from forming.

To complete this exercise, you can follow a straightforward set of steps:

Step 1: Tighten your lips and hold them towards each other so that you can no longer see them. You will notice that the skin around your lips is kept tense in this shape.

Step 2: Place each forefinger on each corner of your lips gently.

Step 3: Hold that position and attempt to smile without showing your lips for 5 seconds. This action will strain your muscles in the area.

Step 4: Relax your muscles and repeat the process another two times.

4. Pucker exercise

This exercise involves the simple use of your lips without the need for hands. For this exercise, the main goal is to strengthen the section between your lips and nose.

When you make expressions, you often utilize the corner of your lips and your chin. Whether you’re smiling, laughing, or frowning, those areas are typically most used. It is an excellent idea to strengthen your upper lips and help lift the lower half of your face to reduce the appearance of laugh lines.

To help you perform this exercise effectively, below is a short sequence of actions that you can complete step-by-step:

Step 1: Shape your lips into a ‘pucker’ shape. You will likely notice that the skin between your nose and lips is curved upwards with this step. This shape helps improve blood circulation and firm up the muscles in the area.

Step 2: Hold that ‘pucker’ shape for at least 10 seconds and release the tension around the area.

Step 3: Repeat the process four times.

5. Pufferfish face

Several exercises help get your blood circulating nicely around your face. Blood circulation is important because it facilitates the cycling of blood, oxygen, and essential nutrients around your face. Good circulation can help to give you healthier skin and help you maintain your natural complexion.

The pufferfish face exercise is one exercise to help with blood circulation and muscle strengthening. To perform this exercise, you need to follow a series of steps:

Step 1: Puff out your face by ensuring that your lips touch tightly and fill your cheeks with air. This step involves pushing air towards your closed lips, giving the appearance of a pufferfish.

Step 2: Hold that position for 5 seconds, then push the air from the center of your face towards your left cheek.

Step 3: Hold that position for 5 seconds and push the air towards your right cheek.

Step 4: Continue holding that position for 5 seconds, then move the air towards your upper lip.

Step 5: Lastly, after 5 seconds, move the air onto your lower lips towards the chin area. It is important to note that you should feel resistance from those areas.

Step 6: Release the air by breathing and repeat the exercise twice.

6. Upper Lip Air Exercise

Strengthening your upper lips is an excellent method to help you achieve a lifted and firmer lower face. The upper lip air exercise intends to help firm up the muscles in your upper lip while also allowing you to strengthen the muscles in your cheek.

The upper lip air exercise can also help circulate blood and oxygen around your cheeks and lower face more effectively, therefore helping you get more nutrients into your skin.

For this exercise, there are a few simple and easy steps for you to follow:

Step 1: Ensure that your face is relaxed and untensed.

Step 2: Place 3 fingers (specifically your forefinger, middle finger, and index finger) on your upper lip in a line. The sides of all three fingers should be touching one another.

Step 3: Close your lips tightly and fill your cheeks with air. Start with centering the air towards your lips.

Step 4: Move the air to your left cheek and then transfer it towards your right cheek. Air should be moving between your left and right cheek at an average speed for this stage.

Step 5: Continue step 4 for 30 seconds and repeat once or twice in one session. It would be ideal for you to perform this exercise at least twice daily for best results.

Protect Your Smile With Facial Exercises

Utilizing the exercises listed above can help strengthen the muscles where marionette lines often appear, reducing the appearance of such lines and helping to lift your smile naturally.

To reiterate an important point, you must complete your chosen exercises daily, at whatever time is most convenient. Adding the activities to your daily routine helps firm up the muscles in your face and prevent marionette lines more quickly and more effectively.

Whichever exercise(s) you choose to incorporate into your routine, it is likely to yield considerably positive results in helping to remove marionette lines (as well as having other benefits to your face shape in general). Simple, non-invasive, and likely to bear fruit, facial exercises are worthwhile.

Filed Under: Face Exercise Instructions, Facial Exercisers

7 Best Facial Exercises After a Stroke

April 3, 2022 by Feyisolami Akinyele

Strokes are usually caused by the decrease or blockage of blood supply to the brain, which can occur without any prior warning. Usually, the symptoms you’ll need to watch out for include headaches and numbness, to mention but a few. There are a few ways to mitigate the damage, and this post sheds light on facial exercises after a stroke that guarantees results.

According to the Center for Disease Control and Prevention (CDC), strokes are the fifth leading cause of death in the USA, as nearly 800,000 people have a stroke each year. Strokes can also cause short and long-term disabilities, depending on how quickly the affected individual gets medical attention.

After a stroke, patients may find it challenging to produce facial expressions, like smiling and displaying emotions, due to weak facial muscles, which is later diagnosed as facial paralysis or Bell’s palsy. 

What is Facial Paralysis?

Facial paralysis occurs due to damage to the nerve cells controlling facial movement. Because of this damage, the muscles can become atrophied, causing some parts of the face to droop. Paralysis of this sort makes speaking, expressing facial emotions, and moving the face difficult. As a result, facial exercises are recommended in post-stroke therapy to assist patients in regaining full or partial facial mobility. By practicing these exercises repeatedly, your brain learns to use different neural pathways to regain facial control.

NB: Though effective in helping you regain and improve your facial movements, not all these exercises will suit you. Discuss with your doctor to get the best recommended facial exercises for you to do after a stroke.

Facial Exercises Post-Stroke

Therapy is one of the treatment processes you’ll need to embark on after a stroke, and a significant part of therapy will involve facial exercises. When done repeatedly and regularly, these facial exercises will place you well on your way to total recovery. 

Based on your therapist’s instructions, you can work on your exercises up to four times daily, with about 30 repetitions per exercise. Let’s take a quick look at some common facial exercises you can do after a stroke.

1. Facial Stumulation

Like you would in a regular gym, you need to perform some warmups before beginning your facial exercises. Preparing your muscles by stimulating them will help reduce discomfort and pain after your exercise. We recommend sitting in front of a mirror to monitor your movements.

For facial stimulation, you’ll need to attempt to move all parts of your face. Start by winking, wrinkling your nose, and moving your mouth from side to side. Remember to work slowly and gently. Don’t let it deter you if you notice that you have no control over some parts of your face. It’s a gradual process – you’ll need time before you regain total facial movement. If it proves to be too difficult, you can use your fingers to massage different parts of your face gently.

2. Smile and Laugh

After your facial warmup, try smiling. Smile without showing teeth, then show a little. Try to balance the muscle strength on both sides. Repeat the process until you can feel your face moving. 

You can also think about a good memory that brings a wide grin to your face so that you can laugh. Laughing uses multiple muscles in the face, making it an excellent way to encourage nerve stimulation and help improve blood circulation to the face.

3. Eyebrow Exercises

Eyebrow exercises are great for stimulating muscles around your forehead. The process is simple. Raise and lower your brows in a slow and steady rhythm. After doing this, keep your eyebrows raised (you can use your fingers) for 10-15 seconds before lowering them. Repeat this process up to 3 times.

Next, wrinkle your forehead and use your fingertips to make firms strokes on your brows, rubbing them up to the hairline. Keep your face in a frowning state, and try lowering the eyebrows. These exercises will help improve movement and blood circulation to your forehead and eyes. Do these for a few minutes two times a day, increasing your repetitions slowly.

4. Eye Exercises

After a stroke, patients might find it difficult to close their eyes, causing difficulty sleeping. These exercises can help you regain control of your eye muscles. Slowly squint your eyes as though you are staring at the sun. Next, look downwards without bending your neck. The idea is to pretend that you’re peeking at something on the floor.

You can also use your fingers to stretch out your eyelids. Place the back of your index finger on your closed eyelid, and with your thumb as an anchor, stretch your eyelid upwards. This exercise helps relax your eyes and prevents the muscles around them from getting too stiff. Winking is also practical here; wink with one eye and gently alternate with the other. However, note that you must stop if you notice any inappropriate muscle movements.

5. Nose and Cheek Exercises

Your nose and cheeks are important parts of your face, so you must pay special attention. If the muscles in this area are weak, they can affect the strength of your entire face. 

The first step for this kind of exercise is to wrinkle your nose. Think about a bad smell, like when you broke a rotten egg. If your nose isn’t moving, you can help by using your hand to push your nose upward. 

Nose and cheek exercises will need you to make a lot of weird faces, so try to have a bit of fun as you go. Flare your nostrils and try to maintain that position for a few seconds. Breathe deeply through your nose before flaring your nostrils. Great news if a part of your face hasn’t been affected by the stroke. Now, try to cover the unaffected part of your face so the muscles in the affected places can do their work without any interference. Repeat these exercises several times throughout your day.

6. Mouth Exercises

Face paralysis can make it difficult to eat or drink. It’s also not uncommon to sometimes have some dribble leak out of your mouth, significantly when the stroke has affected the tongue. These exercises can help strengthen your mouth and jaw muscles, giving you better control of your facial movements.

Start by opening your mouth wide. Pretend to smile before closing your mouth. Practice frowning as well. Next, gently pucker your lips, place them in a position as though you’re about to whistle, and then relax. Finally, open your mouth wide but place your hands under your chin to restrain movement.

7. Jaw and Tongue Exercises

To strengthen your jaw and tongue muscles, try these exercises: Start by sticking out your tongue as far as possible and holding it for about five seconds before resting. Also, try retracting your tongue inside your mouth and keeping it at the roof of your mouth for three seconds before relaxing.

Next, stick out your tongue as far as you can and press down on it with the back of a spoon as you try to lift it. Finally, place a finger on your cheek about one inch from the corner of the mouth, and then push that finger with your tongue from the inside of the mouth. You can stretch your jaw by opening your mouth wide, moving your lower jaw left and right, and then moving it circular. You can repeat these motions ten times each, four times a day.

Benefits of Facial Exercises Post-Stroke

The big question is, do facial exercises work? The answer is yes. Studies have shown that these face workouts can help improve the functionality of the face and can assist patients in restoring some of their lost function. These recommended exercises will play a crucial part in your recovery from facial paralysis and, when done right, will lead you to a faster recovery.

Conclusion

While performing facial exercises, you must be as gentle as possible. Chew your food using both sides of the mouth to retain the natural pattern of your muscles. 

The exercises we’ve listed are safe and straightforward. Ensure that you don’t overexert your muscles. If your muscles feel stressed, try to relax. Don’t rush the process. You’ll recover faster than you think.

Filed Under: Face Exercise Instructions, Facial Exercisers

The Best Exercises For Jowls And Cheeks

February 11, 2020 by Sarah Gray

jowls and cheeks

Sagging jowls and cheeks are at the top of the list of the most disliked signs of getting older.

As the years go by, it is inevitable that our faces will start showing signs of aging. Jowls and loose skin on the cheek areas are the most noticeable features, which can make us feel self conscious. It is a tell tale sign of how old we really are and most of us like to keep that a secret.

You may be afraid the your taut and smooth skin are a thing of the past, but you shouldn’t fear. Sagging jowls and cheeks can be easily treated by performing several key facial exercises.

Let’s take a look below, at two of the best exercises for jowls and cheeks:

Jowl Tightener

This article recommends adding the following exercise into your regular daily routine. It will help tighten the facial and chin areas. When done correctly, you should also see a reduction in the loose skin in your jowl area.

The first movement in this exercise is to close your mouth. Next, move your lower jar in a forward and upward motion, lifting your lower lip. Hold this position for ten to fifteen seconds, then return to original position and repeat ten to fifteen times.

When done correctly, you will feel the muscles stretching in the jawline and under the chin.

Cheekbone Definer

An exercise mentioned in this article targets the cheek and cheekbone area. The result of performing these movements on a regular basis, is smoother skin on your cheeks and a well defined cheekbone.

While sitting up, with your neck and back straight, lightly close your mouth. Next, make a pucker motion with your lips, so that it resembles a pout.

Be mindful to use the muscles in your cheeks to create the pout. If you are unsure, just place your fingers lightly on your cheeks to make sure those are the muscles that you are using.

Hold this motion for ten seconds and release. You should repeat this exercise ten times every day.

Conclusion

A sculpted jawline and prominent cheekbones can still be possible, no matter what your age. The key to maintaining a smooth and taut appearance, is consistence. In order for the above exercises to be effective, you must do them every day.

In addition to doing the above exercises on a regular basis, you must implement other skin care practices, as well.

One of the best tips is to stay hydrated, by drinking plenty of water. When our bodies are dehydrated on the inside, it will show on the outside. Our skin will become wrinkled and dry. If we drink enough water, you will plump up the skin, making it look fuller. Fine lines will also be less visible.

You should also eat a healthy diet, which is rich in green leafy vegetables. Avoid processed, fatty foods and sugar. The healthier you eat, the better your skin will look.

For further reading, check out: Facial Tapping – What Are The Benefits And Does It Really Work? and Facial Yoga – The Best Exercises For Toning Skin.

Image: Flickr

Filed Under: Face Exercise Instructions

The Best Anti Aging Facial Exercises You Can Do At Home

December 31, 2019 by Sarah Gray

anti aging

Anti aging facial exercises are an excellent way to create a more youthful appearance.

These exercises are are very simple to do and require little time. Anti aging facial exercises don’t require any equipment, which makes them even more convenient and cost effective, as well.

As we age, the fat between our skin and facial muscles becomes thinner. Once that happens, sagging and drooping begins to occur, making us look older.

A recent study by Northwestern Medicine discovered that facial exercises will strengthen the muscles in the face. When this happens, the fullness from our younger years is restored. This will create the younger appearance we all want to keep.

Let’s take a look at how you can shed a few years from your appearance, with just a few simple moves:

Recommended Anti Aging Exercises

Cheek Push-Up Exercise

This article recommends the following popular anti aging facial exercise, which will help bring fullness to the cheeks.

Step One: Smile as wide as you can.

Step Two: Position your lips into a long “O” shape.

Step Three: Move your top lip over your teeth.

Step Four: Give a big smile and place your index fingers on top of your cheek muscles, just under the eyes.

Step Five: Relax the muscles in your cheeks.

Step Six: Smile once again with your mouth closed and lift the corners of the mouth as high as you can.

Repeat this movement ten times. On the last repetition, hold the position for twenty seconds, while raising your cheek muscles as high as you can.

Cheek Sculpt Exercise

This exercise is similar to a massage motion used by estheticians, while performing a facial treatment.

Step One: With your lips tightly pressed together, smile as wide as you can. Be mindful not to show any teeth during this motion.

Step Two: Position your index fingers at each corner of your lips. Gently press and slide your fingers across the cheek muscle in an upward motion. Hold this position for twenty seconds.

Repeat this exercise three times.

Eyebrow Lift Exercise

As we age, our eyebrows will start to sag and droop. The following exercise will help reverse and combat further sagging if performed on a daily basis.

Step One: Lift your right hand over the top of your head.

Step Two: Press your ring finger on the outer corner of your left eyebrow and lift the skin towards your temple.

Step Three: While doing the above motion, stretch your neck towards your right shoulder. Hold this position for ten seconds and repeat on opposite side.

Conclusion

If you get yourself on a schedule to do the above anti aging facial exercises, it should easily become a habit. You won’t have to think about trying to squeeze it in.

Pick a time when you have a few minutes in the evening while you are watching television or removing your makeup for the night. You may find it more convenient to do them in the morning before you start your day.

In addition to regular facial exercises, eating a healthy diet and staying hydrated are also very important.

Be sure to always protect your skin from the sun’s ultra violet rays, by using a sunscreen with an SPF of at least 50. Wear sunglasses to protect the delicate skin around the eyes.

The most important thing is consistency. Within no time, you should start to see results. Keep it up and you will have the young, firm skin that all of your friends will admire.

For further reading, check out: What Causes Crow’s Feet And How To Minimize Them and How To Know If Your Facial Exercises Are Working.

Image: Flickr

Filed Under: Face Exercise Instructions

Which Facial Exercises Should You Do To Maintain Firmer Skin

July 16, 2019 by Sarah Gray

maintain firmer skin

To maintain firmer skin, facial exercises are at the top of the list of things you can do.

The reason facial exercise works is because it strengthens the muscles in the face and stimulates blood circulation. This article states that they may also stimulate collagen production.

Facial exercise is not only simple to perform, but you can do it while doing other things, such as taking a bath or watching television.

Build yourself a routine by picking out the best time of day to fit in a few minutes for yourself. You can even set an alarm or reminder on your phone to alert you when it is time to start.

They key to maintain firmer skin is to stick to your regimen and don’t slack off on doing your exercises. Before you know it, they will automatically be a part of your day and you will no longer have to be reminded to do them.

Let’s take a look at which facial exercises will help you maintain firmer skin:

Cheek Firmer

For this exercise, you will puff out your cheeks with air and gradually move the air from one cheek to the other. Be sure the skin is taut and you can feel the muscles in your cheeks stretching. Continue as long as you feel comfortable and repeat three times per day.

This exercise will help keep your face firm up and will improve sagging that has already occurred.

Face Relaxer

Dr. Ava Shamban states that when we are feeling stress, we furrow our brows and clench our teeth, This can make our face age more rapidly.

A great way to release the tension in the face is to close your eyes, just relax and let the jaw fall loose. Take deep breaths and imagine a light between your eyes that slowly soothes and relaxes every muscle in your face. Sit this way for one minute and increase to three minutes for maximum results.

Eye Tightener

If you are experiencing loose skin around your eyes, this exercise will help it bounce back and help smooth forehead lines as well.

Gently hold down the eyelid with your finger, then raise your eyebrows up as far as they will go. Hold the position for ten seconds. Repeat this exercise three to five times a day.

Forehead Smoother

A great exercise to smooth those forehead lines is to look straight in front of you. Using your index fingers, pull the skin of your forehead back as far as it will go. Hold this position for ten seconds and repeat one more time.

Conclusion:

In addition to performing the above exercises on a regular basis, there are other things you can incorporate into your lifestyle that will also help maintain firmer skin.

One of the more important things to remember is to use a sunscreen when you go outdoors and avoid overexposure to the sun in general. The sun’s UV rays will destroy the collagen and elastin in the skin, causing it to lose its firmness.

A large brim hat will help keep the sun off your face and can look very stylish as well. Keep your eyes covered with sunglasses to avoid causing crows feet and other wrinkling around the eyes.

Another very important factor, is to stay hydrated. When our bodies don’t take in enough water, it is visible in the skin and it tends to look dry, have a crepe texture and will appear looser. We can help plump our skin by drinking plenty of water throughout the day. Try to drink at least two liters a day for maximum benefit.

Our bodies not only need to be hydrated on the inside, but our skin needs hydrating as well. Use a quality eye serum and facial moisturizers dedicated to your skin type, to improve texture and firmness.

For further reading, check out: 3 Reasons You May Look Unhappy When You Look In The Mirror and How To Apply Eye Makeup For A More Youthful Appearance.

Image

Filed Under: Face Exercise Instructions

  • Page 1
  • Page 2
  • Page 3
  • Page 4
  • Go to Next Page »

Primary Sidebar

Recent Posts

  • How to Accentuate Your Cheek Bones, the Right Way
  • Can Your Skin Become Immune To Skin Care Products?
  • Wash Face Post-Workout: Yay or Nay?
  • How Does Diet Affect Your Hair?
  • Jack LaLanne: The Pioneer Of Facial Exercises

Facial Exercise Programs

  • What is the suitable age for facial exercises?
  • 4 Signs You Need A Facial Exercise Program
  • Carolyn's Facial Fitness
  • Cynthia Rowland Facial Exercise
  • Facercise by Carole Maggio
  • FlexEffect by Deborah Crowley

Copyright © 2025 · AIKO Theme on Genesis Framework · WordPress · Log in